
Last updated November 18, 2026
 Hardwood
 Engineered hardwood
 Luxury vinyl plank
 Laminate
 Porcelain tile
 Carpet
 Shaw
 Mohawk
 COREtec
 Pergo
Free in-home measure and written estimate: Shaw, Mohawk, COREtec and Pergo lines compared on your own rooms, with carpet, tile, vinyl plank, laminate and hardwood laid out side by side
Get your free estimateHow to Prepare Your Home for a Flooring Installation in Winchester
A flooring crew that shows up to furniture that hasn’t been moved, baseboards nobody flagged, and a furnace that’s been off for a week will cost you money before anyone cuts a single plank. The installation itself is the part homeowners think about. The 48 to 72 hours before it starts is where jobs actually go sideways: boards gap because the material sat in a cold garage, the crew spends the first hour hauling a sectional out of the room, and a transition strip doesn’t match because nobody decided on it ahead of time. This guide walks Winchester homeowners through a room-by-room, day-by-day preparation sequence, from acclimation to HVAC settings to what to do about the dog. By the end you’ll know exactly what to do, what to delegate, and what to leave alone.
Quick Answer
To prepare for a flooring installation in Winchester, get the material into the home 48 to 72 hours ahead so it can adjust to indoor conditions, empty and clear the work area including closets, keep the HVAC running at normal living temperature the whole time, and decide on baseboards and transitions before install day. Most delays we see come down to those four things, not to anything that happens once the crew starts.
Styles & brands we work with
- Hardwood
- Engineered hardwood
- Luxury vinyl plank
- Laminate
- Porcelain tile
- Carpet
- Shaw
- Mohawk
- COREtec
- Pergo
Table of Contents
- The acclimation protocol for Winchester’s climate
- Furniture removal: what installers won’t move
- HVAC and temperature: why the house needs to stay at living temperature
- Baseboards and transitions: decide before install day
- Pets, kids, and how long rooms are genuinely off-limits
- The room-by-room prep checklist
- The 72-hour countdown
- What happens on install day
The acclimation protocol for Winchester’s climate
Flooring material needs to sit inside your home at normal indoor conditions for 48 to 72 hours before installation. That’s the short version. The longer version matters more in Winchester, where summer afternoons push well past 100°F and winter nights drop toward freezing. A box of plank flooring that spent a week in a hot garage or a cold storage container has to equalize with your interior before it goes down, and moving it inside early is the only way that happens.
Where the material sits matters as much as when it arrives. Put it in the room where it will be installed, or in a conditioned space immediately adjacent. Don’t leave it in the garage, on a covered patio, or in a shed. Those spaces swing far harder than the house does, and in a Nevada summer a garage can run 20 degrees hotter than the living room by mid-afternoon.
How to stage material for acclimation
- Confirm the delivery window. Material should land in the home 48 to 72 hours before the scheduled install, no earlier and no later. Earlier means it sits around and collects dust; later means the crew can’t start on time.
- Move it into the install room or the next room over. Both spaces need to be conditioned, not a garage or a patio.
- Stack boxes flat and off the floor on a pallet, a few sheets of cardboard, or scrap plywood. Concrete slab pulls moisture and you don’t want the bottom cartons wicking it.
- Open nothing. Leave cartons sealed until the crew gets there. The product instructions and the written estimate set the exact acclimation requirement for what you bought, and those trump general advice.
- Keep the HVAC running normally. No open windows, no space heaters, no turning the system off because the room is empty anyway.
Some materials need less time and some need more. Carpet generally acclimates faster than rigid plank. Solid wood wants a longer settle than engineered. That’s why we check the product’s own instructions against your home at the estimate rather than quoting one number for everything. When you’re weighing which material suits a room, carpet installation and tile each carry their own prep rhythm, and it’s worth knowing which one you’re signing up for before delivery day.
Furniture removal: what installers won’t move
Most installers will not move furniture. That’s the reality of the trade, and it catches homeowners off guard every week. A crew arrives to install a floor, not to run a moving service, and their tools and time are budgeted for the material. Anything that stays in the room becomes an obstacle, and obstacles cost time. If you want the job to move, the room needs to be empty before anyone knocks.
What has to come out
- All freestanding furniture. Sofas, beds, dressers, bookshelves, dining sets, nightstands. Empty means empty.
- Electronics and anything fragile. Televisions, monitors, lamps, speakers, decor. You don’t want a floor scraper anywhere near a screen.
- Closet contents. Walk-in closets and reach-in closets count as part of the room if the flooring runs through them. Empty the shelves and the floor.
- Area rugs, floor plants, pet bowls, wastebaskets. Small things still trip up a crew.
What needs disassembly, and what needs a pro
Beds should come apart. Most frames come apart with a handful of bolts, and a queen or king bed won’t come through a hallway assembled without gouging something. Same for large desks, wall units, and anything with a glass top. Disassemble these the day before install, not the morning of.
Some furniture shouldn’t be moved by homeowners at all. Pianos, safes, gun safes, aquariums, and any piece over a few hundred pounds need a professional mover. The damage risk to the floor, the furniture, and your back isn’t worth saving the moving fee. If a piano or a large safe is in the install room, book the mover for the day before and the day after. If you’re planning around a whole-home job, our Flooring Winchester team can talk through the sequence room by room so you’re not shuffling everything into one overloaded space.
There’s a practical trick here: don’t move furniture into an already-finished room and don’t pile it all into one hallway. Spread it. A hall stacked floor to ceiling becomes dangerous, and it makes it hard for anyone to get through the house while work is happening.
HVAC and temperature: why the house needs to stay at living temperature
Keep the HVAC running at your normal living temperature for the entire installation, from material delivery through the last trim piece. In a Nevada climate, this isn’t a nice-to-have. The same temperature swings that make Winchester summers brutal and winters cold are exactly what warp, shrink, and cup flooring that was installed under the wrong conditions. The floor moves for the life of the home, and it wants to move from a stable starting point.
The instinct for many homeowners is to shut the system down while the room is empty and save a little on the electric bill. Don’t. An empty room still needs to be conditioned, and the crew is working in there for hours. If it’s 108°F outside and the AC is off, the room becomes unsafe to work in and the material sits in an artificial environment it will never see again.
What “normal living temperature” means in practice
- Whatever you’d set the thermostat to on a typical day. Not a special install setting.
- Consistent across the whole house. A cold bedroom and a warm living room create a gradient that uneven material exposure makes worse.
- Running before the material arrives and after the crew leaves. Turn it on two days early, not the morning of.
- Windows closed. Cross-ventilation sounds nice but it defeats the purpose.
There’s one more thing specific to this part of Nevada: the sun. In Winchester, afternoon sun through a west-facing window can heat a floor surface well above the room’s air temperature. If your install room catches heavy afternoon sun, close the blinds or draw the shades during acclimation and installation. It keeps the material from baking on one side only.
We schedule temperature-sensitive prep into the estimate because it affects the schedule, not because it’s a hidden charge. Ask about it up front and you won’t be surprised. If you want a sense of how this plays out town by town, our Winchester page covers the local service picture.
Baseboards and transitions: decide before install day
Decide on baseboards and transitions during the estimate visit, not on install morning. This is the single most common source of last-minute delay we see on jobs in Winchester. The crew needs to know whether baseboards come off or stay put, whether they go back on or get replaced, and how each doorway and each material change is handled. Every one of those decisions changes the order of work.
The baseboard decision, step by step
- Are the baseboards staying or going? If they’re being replaced or repainted, remove them before the floor goes down. If they’re staying, the crew works around them and the flooring runs to a specified point.
- Who’s removing them? Usually the homeowner, unless it’s built into the estimate. Removing baseboards is straightforward, but it’s knuckle-busting work and the wall behind them is often messier than expected.
- Who’s re-installing them? Ask. If the estimate doesn’t include trim, plan to hire a finish carpenter or handle it yourself after the floor cures.
- What happens to shoe molding? If you have shoe molding, it often gets replaced rather than reused, because removing it from the baseboard usually breaks it.
- What about the walls? If the baseboards come off, expect to touch up paint where the old caulk line was. Do the touch-up after the flooring and trim are back.
Transitions and doorways
Every doorway, every material change, and every place where the floor meets a fireplace hearth, a stair, or a sliding door needs a transition decision. Options are usually:
- A T-molding where two floors meet at the same height.
- A reducer where one floor is noticeably taller than the other.
- A threshold at exterior doors.
- Nothing at all where the same material runs uninterrupted through a doorway.
Have those decisions locked in writing before install day. If you’re moving from one material to another between rooms, thinking about that transition early helps. A palette where a tile flooring installation meets carpet in an adjacent bedroom, for example, needs a clean line at the door, and it’s far easier to plan than to retrofit.
If you’re choosing tile for any of these spaces, look at the tile edge and the grout line before you commit. The grout joint is a design decision, not a default. A Daltile glazed porcelain up against a Shaw carpet wants a specific border width, and picking that on install day almost always leads to a compromise someone lives with.
Pets, kids, and how long rooms are genuinely off-limits
Plan for the install room to be off-limits to pets and small children from the moment material goes down through the moment the last piece of furniture returns. That’s typically a few days of disruption per room, not an hour. Expect real upheaval, then work around it. The families who manage flooring installs well are the ones who decide on a staging zone before the first box arrives, not the ones hoping it works out.
What to prepare for pets
- Set up a closed-off room on the other side of the house, with food, water, a bed, and a litter box if applicable.
- Keep pets out of the work zone entirely. Even the friendliest dog will walk on fresh adhesive or into an open stain can given half a chance.
- Have someone available for the dog during the noisiest hours. Nail guns, floor scrapers, and tile saws are loud. Some dogs handle it fine and some panic.
- Think about the exit route. If the crew is working near the front door, use the back door for walks.
What to prepare for kids
- Close and secure doors to the work zone, and consider a temporary gate if you have a toddler who gets around easily.
- Move toys and small items out of the room before material delivery, not the night before. Small objects in a work zone are a trip hazard for the crew and a loss you’ll miss later.
- Have a plan for the sibling rooms. Kids sharing a bedroom while another room is installed can be a stretch. Move mattresses to the floor in the secondary room if needed, but don’t stack furniture dangerously.
Fumes and ventilation by product type
Every material and every finish has its own scent and its own period of ventilation. We won’t pretend to give you a single number that applies everywhere. What we will say: finish products and adhesives need real ventilation, and the room needs to be aired for however long the product instructions specify. Tell us at the estimate if anyone in the household is sensitive to strong smells or has a respiratory condition, and we’ll build that into the material recommendation and the schedule. Also note that refinished hardwood in particular has a distinct smell that lingers for some days, and the product’s own instructions set how long before heavy traffic.
The room-by-room prep checklist
Walk the house two days before install and check off each room. This list is deliberately granular, because “clear the room” isn’t a usable instruction when you’re standing in a fully furnished bedroom.
Bedrooms
- Strip beds, disassemble frames, and stack hardware in a labeled bag.
- Empty nightstands and dressers into boxes before moving them out.
- Clear closet floors and shelves.
- Remove wall decor that hangs over the room or anything that might vibrate off the wall.
- Remove curtain rods or at least the curtains, if they hang close to the floor.
Living rooms
- Move the sofa, chairs, coffee table, and side tables out of the home or into a designated staging area.
- Unplug and move TVs and electronics. Take a photo of the back of the entertainment system before you unplug.
- Remove area rugs and roll them up for storage.
- Disconnect, drain, and move aquariums carefully; a fish tank on a slowly installed floor is a bad day waiting.
- Empty any furniture with drawers, because the drawers themselves are separate pieces when a piece is being carried.
Kitchens
- Empty lower cabinets and the lower half of any pantry.
- Unplug and move the refrigerator if flooring runs under it, and arrange for temporary storage of the contents in coolers.
- Plan meals around a period where the kitchen may not be usable.
- Disconnect the ice maker line before moving the fridge.
Bathrooms
- Remove towels, bath mats, shower curtains, and small shelving.
- Empty the vanity cabinet if the floor runs under the toe kick.
- Consider a temporarily relocated toilet if the flooring runs under it; that move is the installer’s call, but ask ahead.
Hallways and stairs
- Remove wall art and mirrors; crews carry long boards and tall material through hallways and don’t want to hit anything.
- Clear any console tables, entryway benches, and coat racks.
- Photograph the existing floor condition before the crew arrives, especially at thresholds and doorways. That photo is useful if anyone, worker or family member, questions a scuff later.
Garage and outdoor staging
- Make sure the crew can get from the vehicle to the door without moving cars.
- Clear a parking spot close to the door.
- Move vehicles out of the way by the start of the install day, not during the delivery window.
The 72-hour countdown
- Day minus three: Confirm the install schedule with our team. Finish decisions on baseboards, transitions, and materials. Schedule a mover if a piano, safe, or aquarium is involved.
- Day minus three to day minus two: Take delivery of the material, if not already on site. Move it into the install room or the adjacent room, stack it flat on a pallet, and keep cartons sealed.
- Day minus two: Walk the room-by-room checklist. Start moving furniture into the staging zone. Keep the thermostat at normal living temperature, windows closed.
- Day minus one: Empty closets and lower cabinets. Disassemble beds and large furniture. Bag and label hardware. Move pets into the designated quiet room. Load the fridge contents into coolers.
- Install morning: Clear vehicles from the driveway. Have a point-of-contact available by phone. Verify that the install room is empty. Confirm pets are contained and children are away from the work zone.
- During install: Keep out of the work zone. Do not open windows for ventilation if that spikes the temperature. Ask the crew lead if you have a question rather than approaching workers mid-task.
- After install: Keep the room at normal living temperature, keep heavy furniture off the new floor for whatever the product instructions specify, and plan baseboard reinstall and paint touch-ups for after that point.
This sequence fits most rooms. Whole-house jobs in Winchester need a longer version, and we’ll work out the room order with you so you’re never without a functioning bedroom, bathroom, and kitchen at the same time.
What happens on install day
The crew arrives, walks the room with you or an available adult, and confirms the plan. Then material starts coming in. Old flooring comes out first, and that’s often when surprises show up underfoot. In our experience, subfloor issues are more common than homeowners expect, and the most frequent is moisture. In a dry part of Nevada, you might not think moisture is an issue, but slab-on-grade construction holds moisture differently than a raised foundation, and a moisture check at the estimate catches problems before the carpet or plank is cut.
Some things crews find mid-job:
- Old adhesive that needs grinding or encapsulation before the new floor goes down.
- Low spots in the subfloor that need leveling compound.
- Squeaks in a wood subfloor that need refastening.
- Sections of old flooring that were themselves nailed through, which affects how they come out.
- Old pet stains that soaked through a pad into the subfloor.
Each of these changes the scope, and each has to be discussed and priced before the crew does the work. This is where a written estimate that clearly states what’s included saves arguments. If a surprise turns up, the crew lead should be able to show you what was found and what the fix will cost before anyone proceeds.
For hardwood, install day looks different. Refinishing existing floors is a restoration, not a replacement. The crew sands, preps, and finishes what’s already there. That’s the case for refinishing first in many older homes, and we’ll tell you at the estimate if the wood is too thin or too damaged to refinish and replacement is the better call. When you’re weighing carpet, tile, and hardwood for a whole home, it helps to think about each as its own specialty rather than one generic “flooring” bucket.
Common Mistakes to Avoid
- Leaving material in the garage to acclimate. A Winchester garage in July or January swings far harder than the house does, and material that sits out there never truly equalizes. It has to be in conditioned space.
- Moving furniture into the finished room mid-install. The floor needs time before heavy loads go back on it, and furniture in a work zone is a hazard. Wait until the crew gives the go-ahead.
- Turning off the HVAC to save money. This is the single biggest mistake in a Nevada install. The temperature swings do real damage to material and make the room unsafe to work in.
- Deciding on baseboards and transitions on install morning. The crew is already on-site and the decision was needed a week earlier. Lock those choices at the estimate.
- Underestimating how long the room is truly out of use. A room isn’t available the moment the last piece is laid; it’s available once the material has set and the product instructions allow traffic.
- Leaving pets loose. Even the calmest dog will investigate fresh cuts and open adhesive, and a pet in the work zone is a hazard to both.
- Not photographing the existing floor condition before the install. It’s a five-minute step that settles any later question about scratches or damage.
- Doing the baseboard reinstall yourself without the right tools. A finish carpenter’s miter saw and nail gun are not the same as a weekend kit, and a bad trim job shows on a new floor.
See the difference
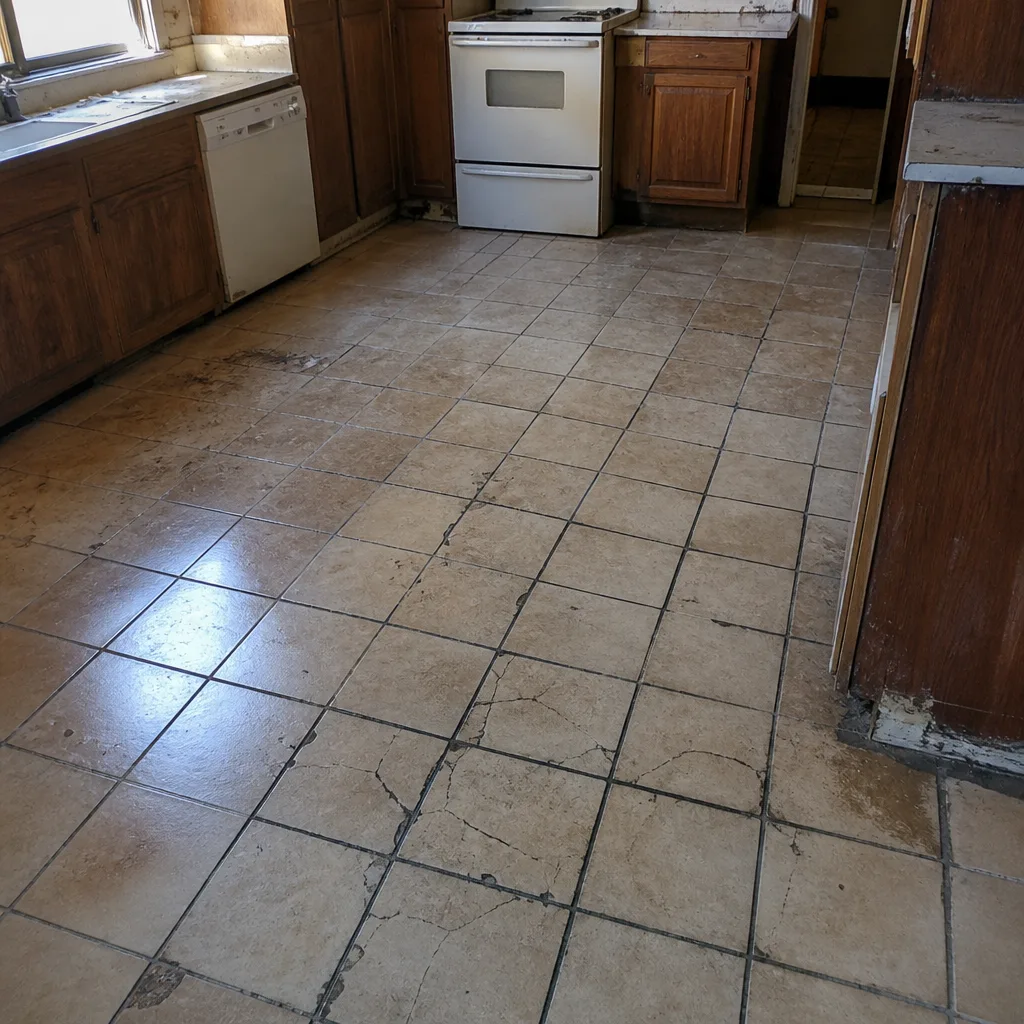 Before
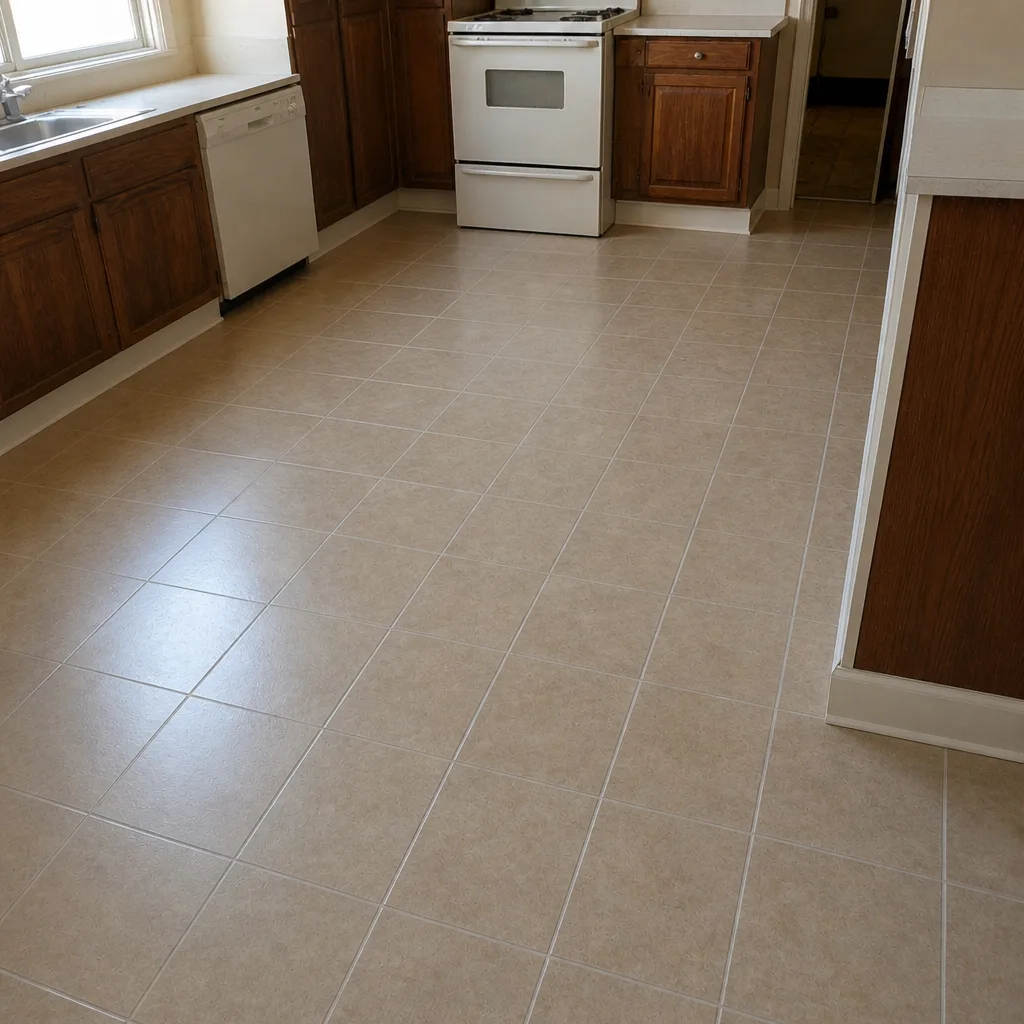 After
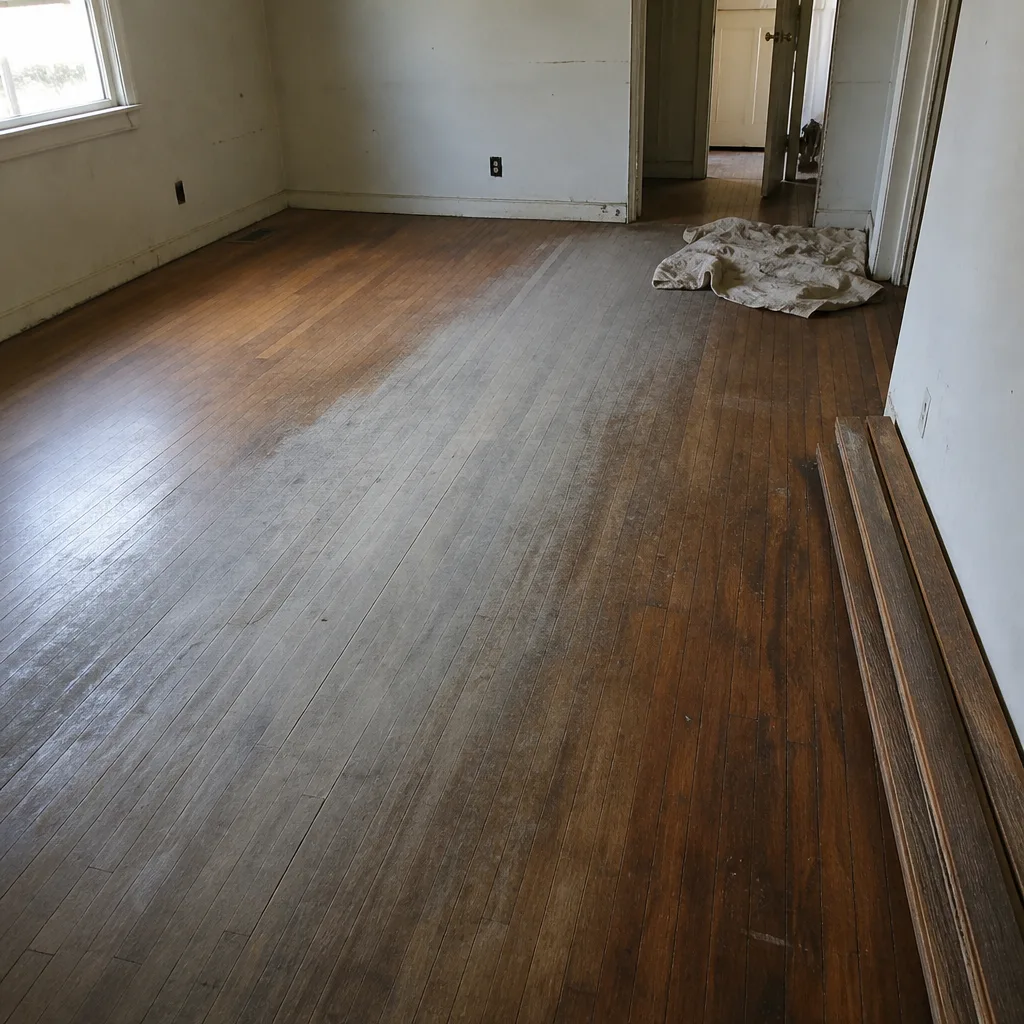 Before
 After
 Before
 After
When to Call a Professional
Call a professional if any of these apply. You’re planning to remove or replace baseboards without knowing whether the walls are plaster or drywall. A moisture issue has ever been noted in the home. A piano, safe, or aquarium is in the room. The flooring runs through a hallway, stairs, or has significant transitions between rooms. The subfloor squeaks, feels uneven, or has visible gaps. The existing floor is hardwood and you’re not certain about refinishing versus replacing.
We also encourage the call if the material is already acclimating but you’re not sure about the thermostat, the baseboard plan, or how to keep pets and kids out of the way. Flooring Winchester offers free estimates in Winchester. Call (844) 761-8337. We answer 24/7. Fast dispatch from 7am to 7pm, Sunday through Friday.
Frequently Asked Questions
Plan on 48 to 72 hours inside the conditioned home before installation. Where that lands depends on the specific product. The product instructions and your written estimate set the exact requirement for what you’ve ordered. Call (844) 761-8337 for an exact quote; estimates are free.
Typically not. Installers move material and install flooring; they don’t run a moving service. Empty the room of all furniture, closet contents, and small items before the crew arrives. Items over a few hundred pounds, like pianos and safes, need a professional mover.
Yes, in most cases. Whole-home jobs and multi-room jobs can be sequenced so you’re never without a functioning bathroom, bedroom, and kitchen. Expect the install room itself to be off-limits for a few days, and keep pets and small children out of the work zone entirely.
Your normal living temperature, running before the material arrives and continuing until well after the crew leaves. Don’t turn the HVAC off to save money on an empty room, especially in Winchester where outdoor temperature swings are wide. Windows stay closed through the install.
Usually yes, if the baseboards are being replaced or repainted. If they’re staying, decide at the estimate whether the crew removes and reinstalls them or leaves them in place. That’s a written decision, not an install-morning judgment call.
They stop and show you before doing the work. The most common issues are moisture, old adhesive, low spots, and squeaky subfloor panels. Each has a fix, and each fix gets priced and approved before anyone proceeds. A written estimate that lists what’s included makes that conversation easier, not harder.
The Bottom Line
Preparing for a flooring installation in Winchester really comes down to four decisions you make before the crew arrives: get the material inside and conditioned for 48 to 72 hours, empty the room completely including furniture and closets, keep the HVAC running at normal living temperature the whole time, and settle on baseboards and transitions at the estimate. Everything else is schedule detail. Do those four well and install day is unremarkable, which is exactly what you want. The right floor for how you actually live in that room starts with the preparation, not the material. When you’re ready to plan, the team is here.
Flooring Winchester offers free estimates in Winchester. Call (844) 761-8337 for yours. We answer 24/7. Fast dispatch from 7am to 7pm, Sunday through Friday.
Written by the team at Flooring Winchester.